Resource Plan Tab - Create resource plan manually
You create the resource plan on the Resource Plan tab. You can plan the operating times of the individual resources.
▶ By default, planning is at monthly level. Other time units can be configured.
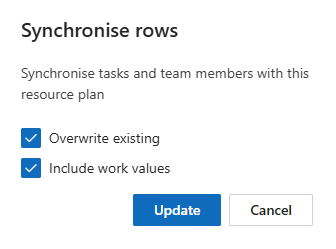
➢Click Sync (1) to transfer already assigned resources to the resource plan. ▶ The Synchronize rows dialog box opens.
➢Click on the Overwrite existing checkbox.
➢Click on the Include work values checkbox if you also want to apply the work values of the resource.
➢Click on Update. ▶ The resources and their tasks are transferred to the resource plan.
➢Click on New (2) to add resources manually. ▶ A new row appears in the table.

➢Click in the cell in the Resource Name column. ▶ A drop-down menu opens.
➢Select the name of the desired resource in the drop-down menu.
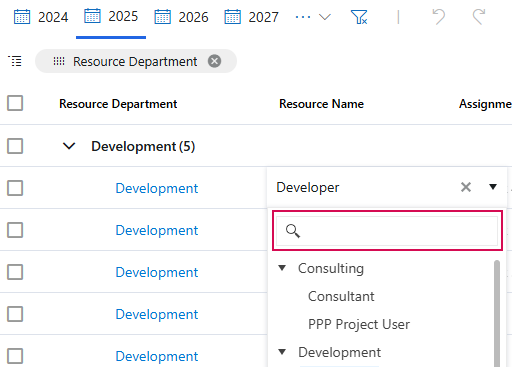
▶ The Resource Department column is filled in automatically if data is available.
▶ The resource is added.
Colors show the utilization of the individual resources. The following color scheme applies:
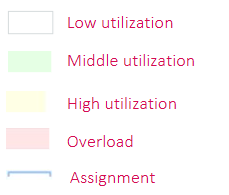
The mouseover shows the number of days on which the resource is available or otherwise scheduled.
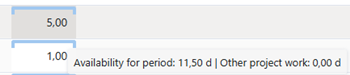
▶ In the monthly field, you can enter the number of days for which you are scheduling the resource.
Duplicate or delete entries:
➢Select the task you wish to duplicate or delete.
➢Click on the checkbox at the beginning of the line of the task. (1)
➢Click on Duplicate or Delete. (2)

▶ The task is duplicated or deleted.
Further functions:
The buttons in the Resource Plan tab offer you even more functions:
▪Graphical representation of the data:
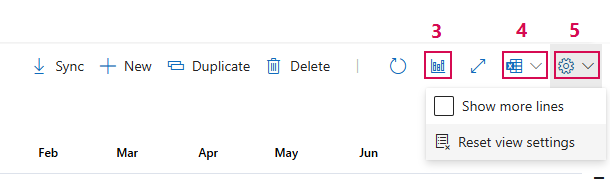
➢Click on the graphic pictogram. (3) ▶ A diagram is shown or hidden below the table.
▪Export all selected rows to Excel:
➢Click on the Excel pictogram. (4)
▪Show more rows or reset display settings:
➢Click on Settings (gear wheel). (5)
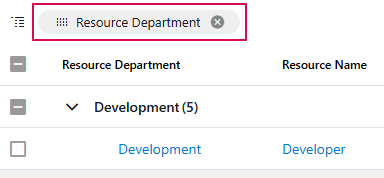
▪Change standard groupings:
➢Drag column header over table.
➢Remove column headings: Click on the cross.
➢Show and hide columns:
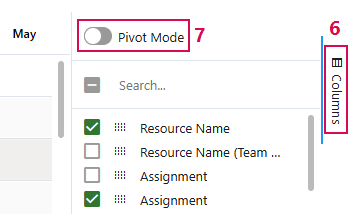
➢Click on Columns. (6)
➢Activate or deactivate the checkboxes.
➢Create pivot table:
➢Click on the Pivot Mode button to activate the pivot mode. (7)
You can determine the order of the column titles using drag & drop.