Add Status Update
To add a Status Update, follow these steps:
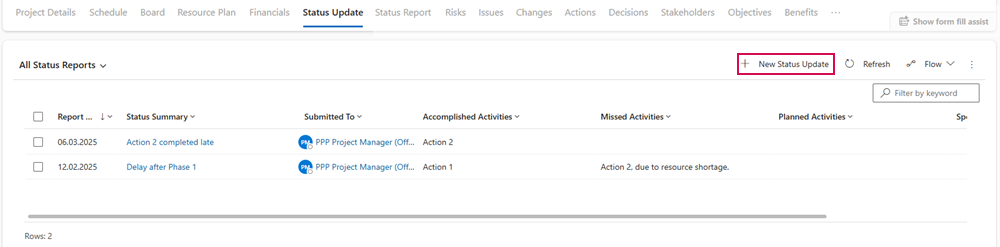
➢Click on New Status Update. ▶ The Quick Create: Status Update form for creating a status report will open.
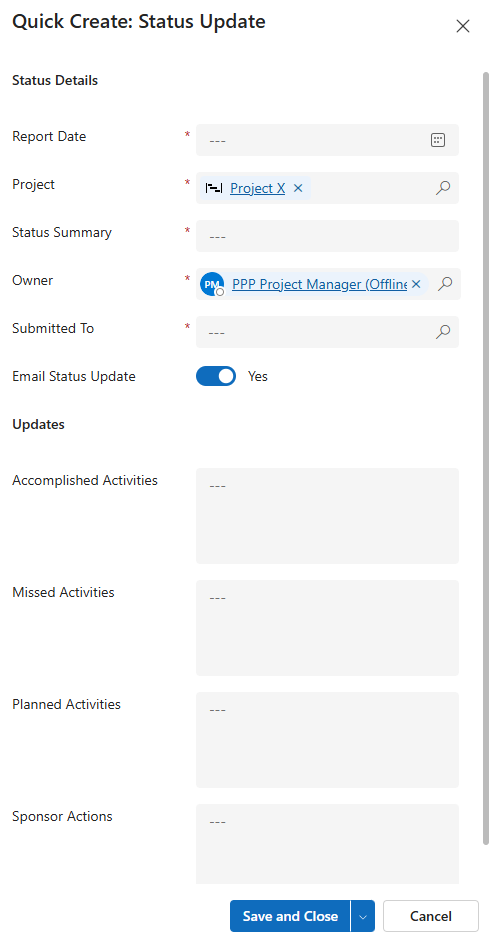
➢Fill in the form:
▶ To add a status update, the required fields must be filled out. All required fields are marked with a red asterisk.
▪Status Details:
▪Report Day:
➢Click on the calendar icon and enter the date on which you are creating the report.
▪Project: The current project is selected by default.
▶ You can select a different project by clicking on the search icon (magnifying glass) and choosing another project from the dropdown menu.
▪Status Summary: Description of the Status Update
➢Enter a description for the status update. It should be as detailed as possible (e.g., Delay after Phase 1).
▪Owner: Creator of the status update. By default, the current user is entered.
▶ You can select a different user as the owner by clicking on the search icon (magnifying glass) and choosing another user from the dropdown menu.
▪Submitted to: Stakeholder to whom the status update is submitted.
➢Click on the input field, press Enter, and enter the desired stakeholder.
▪Email Status Update: enabled by default.
➢Click the toggle switch to disable sending the status update via email.
▪Updates: Description of the status updates.
➢ Enter the descriptions of the status updates in the corresponding field. The description should be as detailed as possible.
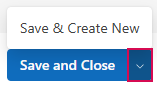
➢Click Save and close.
Or
➢Click the down arrow and select Save & Create New to add another status update.
▶ A status update has been added.
▶ The status update appears in the table All Status Reports.