Project Types
In the Project Types section, you can create and manage project types that meet your company’s specific requirements. Within each project type, you define the structure and the tabs that will appear in the project.
In the following sections, we will guide you through all available features and show you step by step how to create, customize, and manage Project Types.
➢Click on Project Types in the navigation bar to go to the Project Type section.
▶ By default, the Project Type section opens in the Active Project Types view.
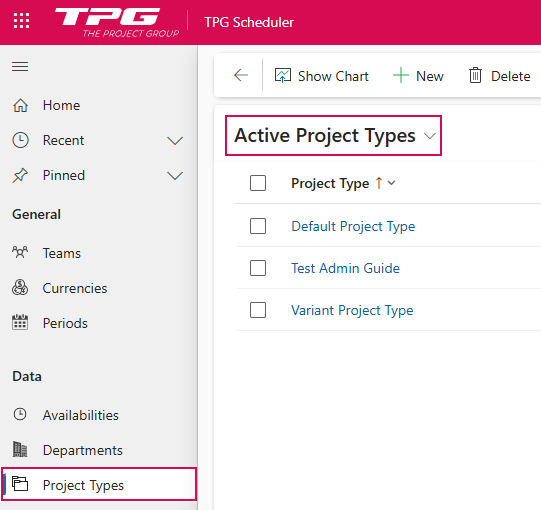
In this view, all active project types are displayed in a table.
You can switch to other views using the drop-down menu:
➢Click the down arrow and select a view:
▪Active Project Types: A table listing all active project types.
▪Inactive Project Types: A table listing all inactive project types.

The following section describes how to create, edit, and manage project types.
▶ The procedure is described in the Active Project Types default view. The procedure is the same in the other views.
Create Project Types:
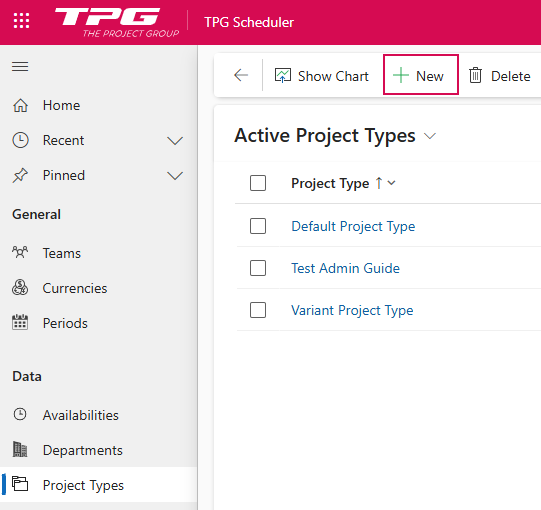
➢Click New in the command bar. ▶ The New Project Type form opens.
➢Fill out the form:
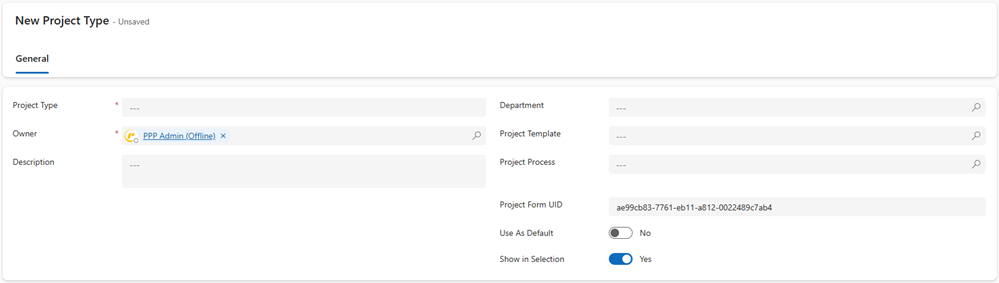
▶ All required fields are marked with a red asterisk.
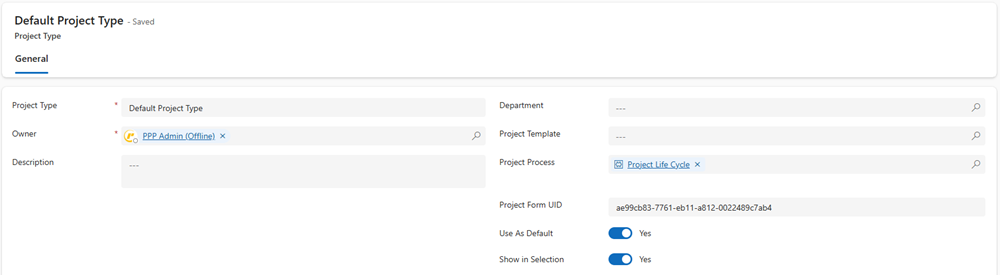
➢Project Type: (1)
➢Enter a name for the project type. This should be as descriptive as possible, e.g., Default Project Type.
➢Owner (2): By default, the system sets the person who created the project type as the owner. You can change the owner.
➢Click the search icon to select a different owner from the drop-down menu.
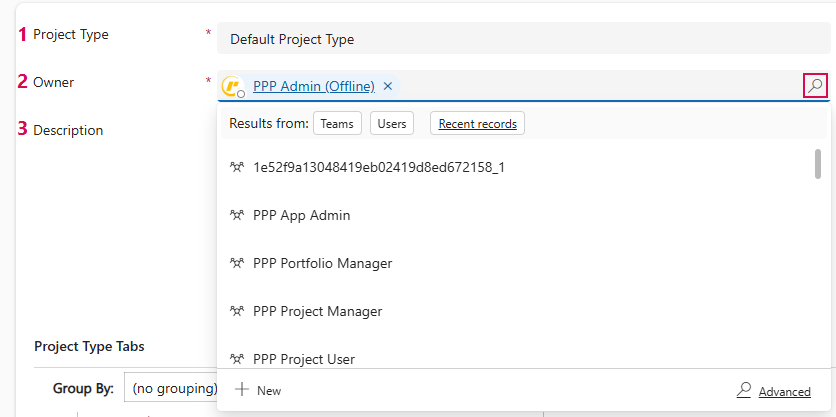
➢Description (3)
➢Enter a description for the project type. This should be as descriptive as possible.
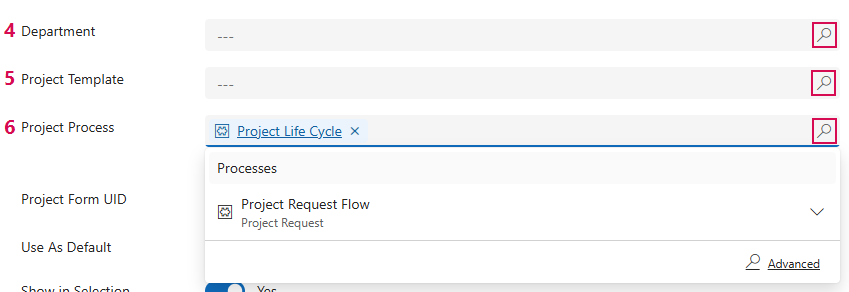
➢Department: (4)
➢Enter the department to which the project type should be assigned.
Or
➢Click the search icon to select a department from the drop-down menu.
➢Project Template: (5)
➢Enter a project template to be assigned to the project type.
Or
➢Click the search icon to select a project template from the drop-down menu.
▪Project Process: (6)
➢Enter a project process to be assigned to the project type.
Or
➢Click the search icon to select a project process from the drop-down menu.
➢Project Form UID (7): An alphanumeric string used to uniquely identify the project type in the system. The UID (Unique Identifier) is automatically assigned by the system. You can edit it.
➢Click in the field and enter the desired change.
➢Use as Default (8): By default, the project type is not set as the default. The slider is set to No.
➢Click the slider to set the project type as the default. ▶ The slider is set to Yes.
➢Show in Selection (9): By default, the project type is displayed in the selection. The slider is set to Yes.
➢Click the slider to hide the project type from the selection. ▶ The slider is set to No.

➢Click Save in the command bar.

▶ A new project type has been created. .
Assign tabs to the project:
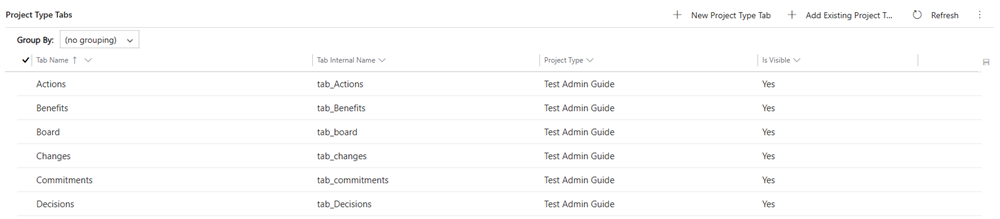
Once the project type has been created, you can assign the tabs that will be displayed in the project to the project type. To do this, the Tabs section of the project type appears:

There are two ways to add a tab:

▪New Project Type Tab: Used to add a linked project type tab.
➢Click New Project Type Tab. ▶ The Quick Create: Project Type Tab form opens.
➢Fill out the form:
➢Tab Name: Enter a name for the tab.
➢Tab Internal Name: Enter the internal name for the tab.
➢Is Visible: Set the slider to Yes to display the tab in the project type.
➢Project Type: By default, the system selects the current project type. You can change the project type by selecting a different one from the drop-down menu.
➢Click Save and Close.
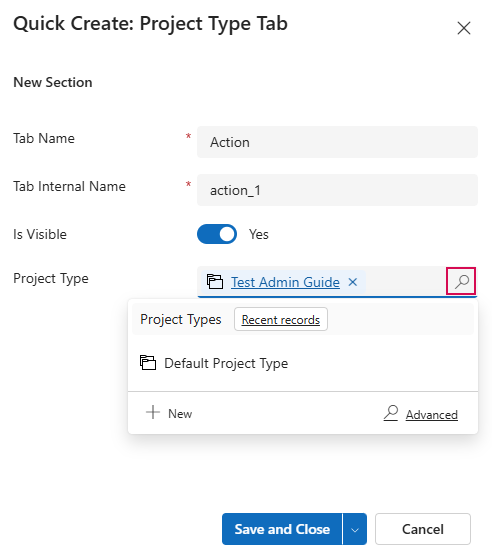
▶ A new tab is created, assigned to the current project type, and appears in the table.
▪Add Existing Project Type Tab: Used to add a missing project type tab item.
➢Click Add Existing Project Type Tab. ▶ The Lookup Records form opens.
➢Click the search icon to select an existing record from the drop-down menu.
➢Click Add.

▶ The selected tabs are assigned to the current project type and appear in the table.
Edit Project Types:
Editing an existing Project Type follows the same process as creating one: All fields that have already been created can be modified as described above.
⚠ Changes to a project type affect the entire system. Any modifications impact all projects that use this project type, as well as the associated plans and processes.
Therefore, make changes with extreme caution and verify their impact on the entire system.
▶ Fields that cannot be edited are marked as locked with a lock icon.
➢Select the project type you want to edit, e.g. Default Project Type.
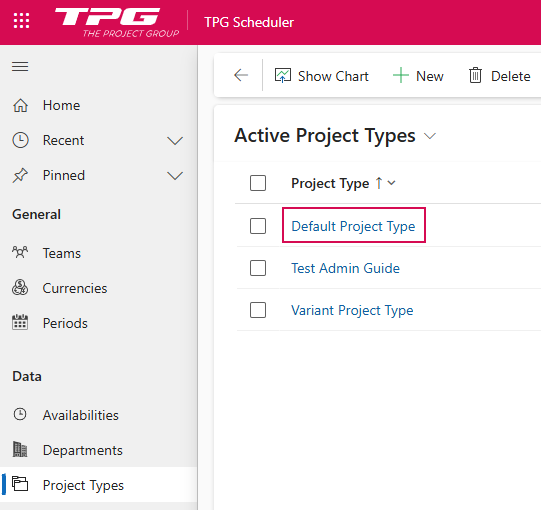
➢In the Active Project Types view, click Default Project Type. ▶ The Default Project Type form opens.
➢Enter the desired changes.
You can edit the tab attributes directly in the table.
➢Click on the desired cell in the table and enter the changes.
Or
➢Click Edit and enter the changes in the project type form.

➢Click Save or Save & Close on the command bar.