Resource Plan Tab - Create Resource Plan manually
You create the resource plan on the Resource Plan tab. You can plan the operating times of the individual resources.
Available views in the resource plan
There are two different views available in the resource plan, which differ in terms of the period displayed:
▪The monthly view for a single year is the default view.
In this view, resources are planned and displayed on a monthly basis within a calendar year. This view is particularly suitable for detailed planning within a year.
▪In addition, the Multi-year view is available.
In this view, resource planning is displayed over several years. The Multi-year view facilitates an overview of long-term planning and resource utilization that extends beyond the end of the year.
▶ The resource planning steps described in this section apply to both views.
▶ For clarity, the steps are shown using the default view.
▶ The use of the Multi-year view is described in the section Use Multi-year view in Resource Plan.
▶ By default, planning is at monthly level. Other time units can be configured.
Add Resources and enter work values:
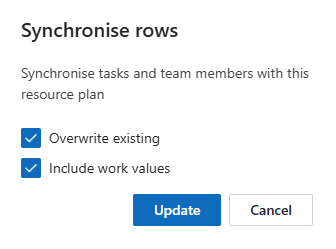
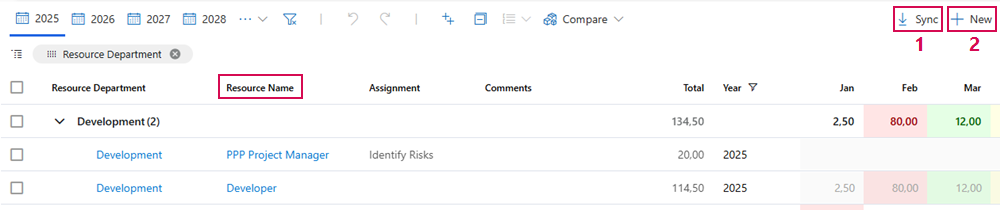
➢Click Sync (1) to transfer already assigned resources to the resource plan. ▶ The Synchronize rows dialog box opens.
➢Click on the Overwrite existing checkbox.
➢Click on the Include work values checkbox if you also want to apply the work values of the resource.
➢Click on Update. ▶ The resources and their tasks are transferred to the resource plan.
➢Click on New (2) to add resources manually. ▶ A new row appears in the table.
➢Click in the cell in the Resource Name column. ▶ A drop-down menu opens.
➢Select the name of the desired resource in the drop-down menu.
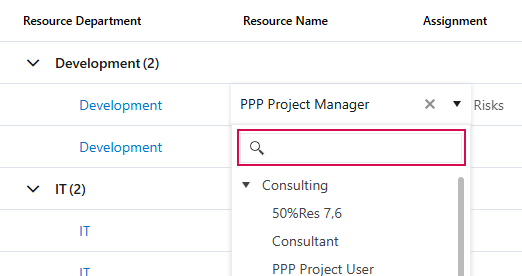
▶ The Resource Department column is filled in automatically if data is available.
▶ The resource is added.
Colors show the utilization of the individual resources. The following color scheme applies:
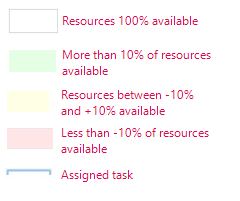
The mouseover shows the number of days on which the resource is available or otherwise scheduled.
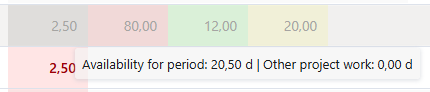
▶ In the monthly field, you can enter the number of days for which you are scheduling the resource.
Duplicate or delete entries:
➢Select the task you wish to duplicate or delete.
➢Click on the checkbox at the beginning of the line of the task. (1)
➢Click on Duplicate or Delete. (2)

▶ The task is duplicated or deleted.
Further functions:
The buttons in the Resource Plan tab offer you even more functions:
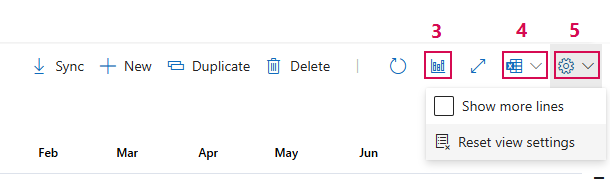
▪Graphical representation of the data:
➢Click on the graphic pictogram. (3) ▶ A diagram is shown or hidden below the table.
▪Export all selected rows to Excel:
➢Click on the Excel pictogram. (4)
▪Show more rows or reset display settings:
➢Click on Settings (gear wheel). (5)
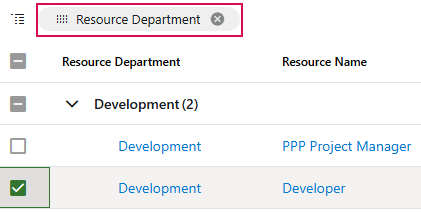
▪Change standard groupings:
➢Drag column header over table.
➢Remove column headings: Click on the cross.
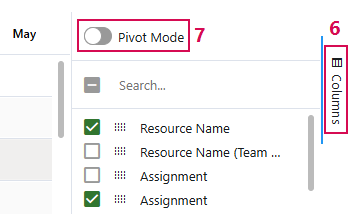
➢Show and hide columns:
➢Click on Columns. (6)
➢Activate or deactivate the checkboxes.
➢Create pivot table:
➢Click on the Pivot Mode button to activate the pivot mode. (7)
You can determine the order of the column titles using drag & drop.
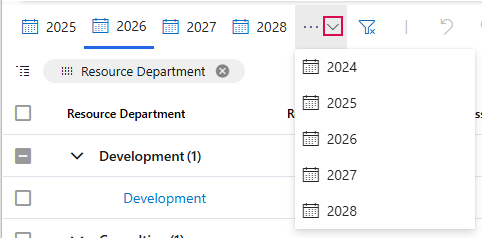
Navigating between years:
➢Click on one of the years displayed to view its resource planning. The currently displayed year is underlined in blue.
Or
➢Click on the down arrow to select a specific year from the drop-down menu.
▶ The view will jump to the corresponding year.