TPG PSLink
User Roles
To initiate job runs for the desktop integration, the signed-in user in TPG PSLink must have the appropriate permissions.
The user must have at least the “Consumer” role:
▪in the TPG PSLink Tenant
▪and in the corresponding Site
Manage user roles:
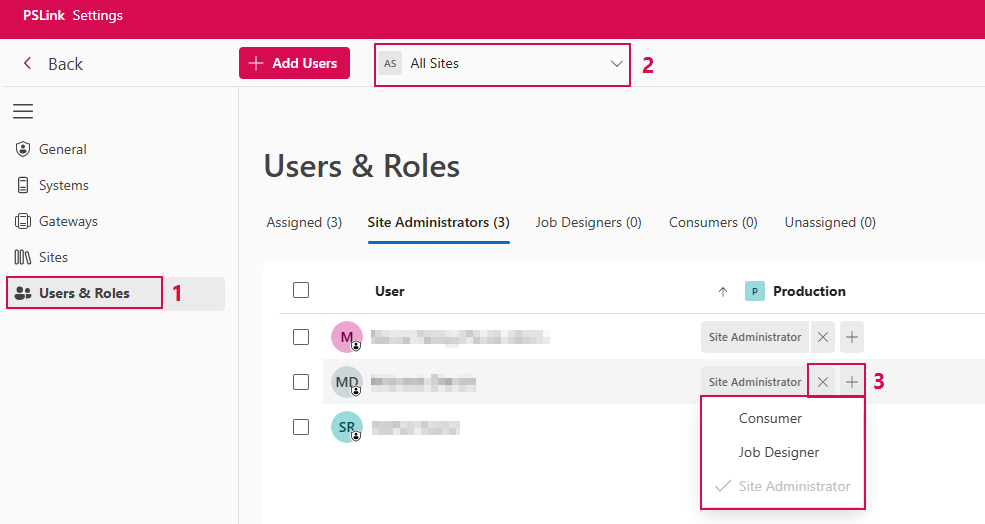
➢Navigate to Users & Roles in the TPG PSLink settings. (1)
➢Use the location selector to choose whether you want to view role assignments for a particular site or for all sites. (2)
➢Manage role assignments as follows (3)
➢Click “X” to remove an existing role assignment.
➢Click “+” to add a new role assignment.
▶ Users who have been added to the tenant but do not yet have a role assigned can be found using the Unassigned quick filter. Assign the appropriate roles to these users there.
Setting Up Connectivity with Microsoft Dataverse
A valid system configuration is required to enable integration with Microsoft Dataverse.
To do this, your site must have a properly configured Microsoft Dataverse system and a system connection.
Follow these steps to set up a connection to Microsoft Dataverse:
1. Check and meet the prerequisites:
Before you configure the connection, make sure you have all the necessary information:
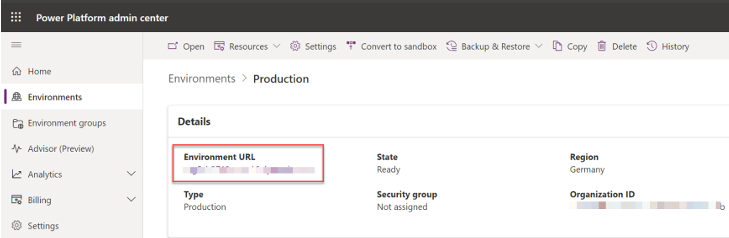
➢Find the Organization URL for your Dataverse environment. You can find this in the Power Platform Admin Center.
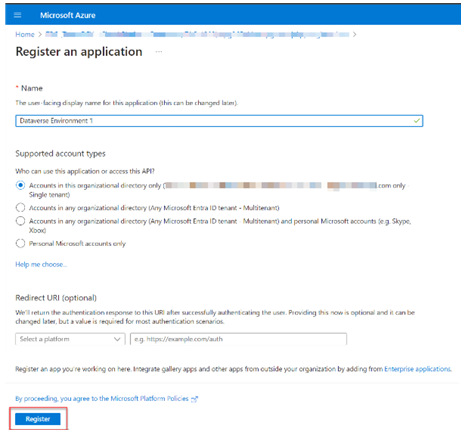
➢Register an application in Microsoft Entra ID (Azure AD): https://learn.microsoft.com/power-apps/developer/data-platform/walkthrough-register-app-azure-active-directory
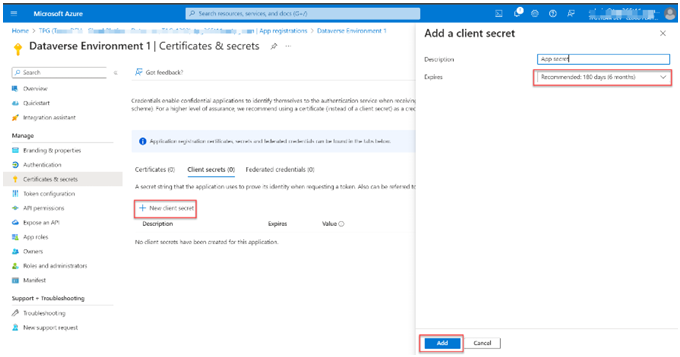
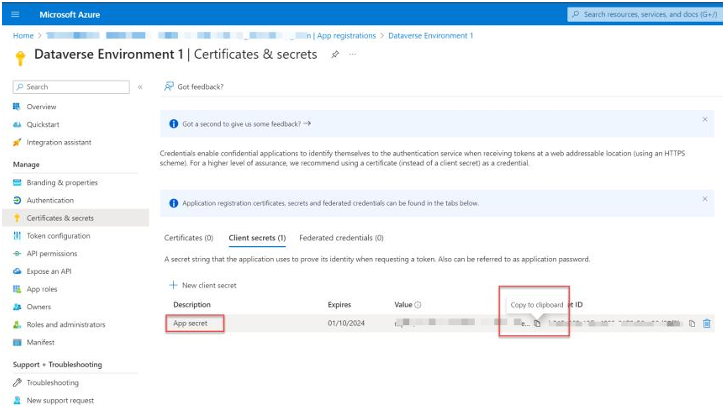
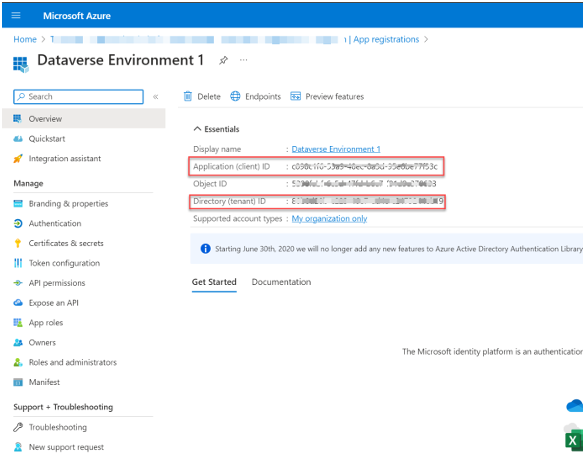
➢Copy the following values from the app registration:
▪Client Secret
▪Tenant ID (Directory ID)
▪Client ID (Application ID)
This information will be needed later for authentication in TPG PSLink.
2. Create an Application User in Dataverse
To allow TPG PSLink to access Dataverse, you must set up an application user:
➢Open the Power Platform Admin Center.
➢Create a new application user for the desired Dataverse environment: https://learn.microsoft.com/power-platform/admin/manage-application-users#create-an-application-user
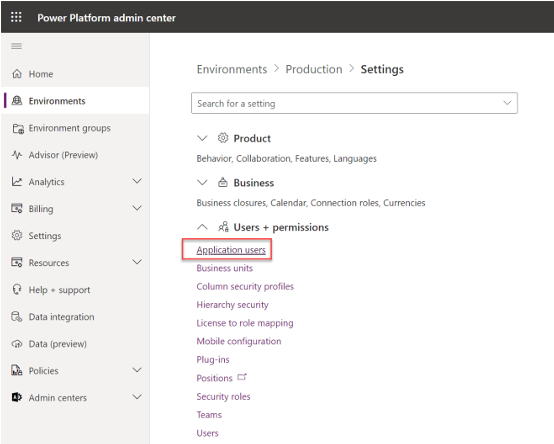
➢Select the Azure application you created earlier.
➢Assign the required security roles, for example:
▪Service Reader
▪Service Writer
▪Service Deleter
▶ Assign only the roles that are necessary for your use case (principle of least privilege).
User Permissions
The MS Project Desktop Integration add-in enables calls to Microsoft Dataverse systems under another user's identity (impersonation). You must enable this function for your configured Dataverse systems in your TPG PSLink tenant.
▶ Before users can sign in to Dataverse, an administrator must approve the permissions requested by PSLink in your Microsoft Entra ID (Azure AD) tenant.
Approve permission:
To approve the permission, you need an account with one of the following roles:
▪Global Administrator
▪Application Administrator
▶ Without one of these roles, the consent page cannot be accepted.
You need the following information:
▪Your tenant ID from your Microsoft Entra/Dataverse tenant
▪The URL of your Dataverse environment, for example yourorg.crm.dynamics.com
▪The application ID (client ID): e92ddea7-53d3-4999-bf59-ab3cafc39e1d
▪The fixed redirect URL: https://pslink.tpgtools.com
Create consent link
Create the consent link by replacing the placeholders in the following URL:
https://login.microsoftonline.com/{tenantId}/v2.0/adminconsent?client_id=e92ddea7-53d3-4999-bf59-ab3cafc39e1d&scope={environmentUrl}/user_impersonation&redirect_uri=https://pslink.tpgtools.com
Placeholder |
Value |
|---|---|
{tenantId} |
Your tenant ID |
[CLIENT_ID] |
Fixed application ID: e92ddea7-53d3-4999-bf59-ab3cafc39e1d |
{environmentUrl} |
Host of your Dataverse environment; any environment in the tenant is allowed |
▶ The client ID is fixed and already included in the URL: e92ddea7-53d3-4999-bf59-ab3cafc39e1d.
Accept permissions
Follow these steps to approve the permissions:
➢Open the complete URL in a browser.
➢Sign in with an account that has the Global Administrator or Application Administrator role.
➢Review the requested permissions.
➢Click Accept.
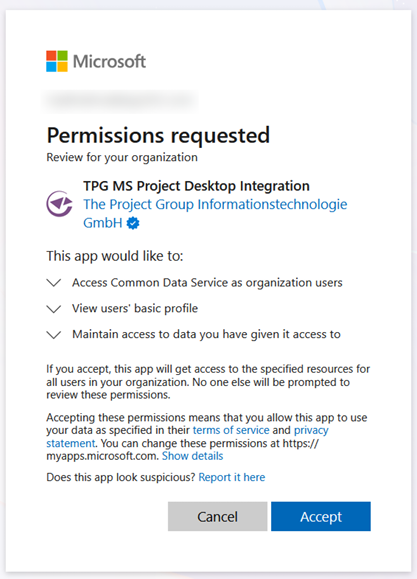
After successful consent, you are redirected to https://pslink.tpgtools.com This confirms that the permissions have been granted for your tenant.
Afterwards, users in your organization can use the add-in with Dataverse authentication.
Configuring Dataverse Systems in TPG PSLink
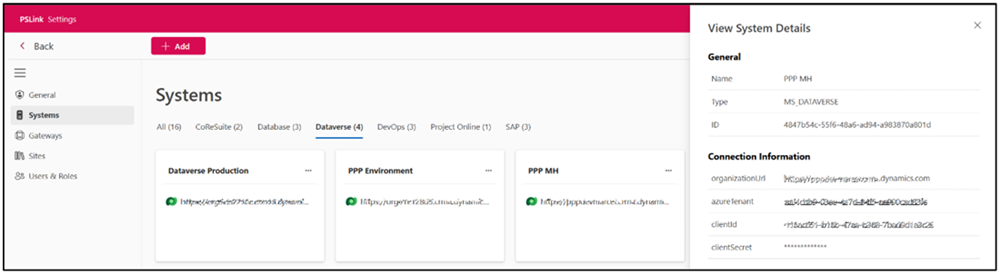
Make sure, that you have a System, which references your TPG ProjectPowerPack Dataverse instance.
You can add a system to your TPG PSLink Tenant in the Settings area of TPG PSLink:
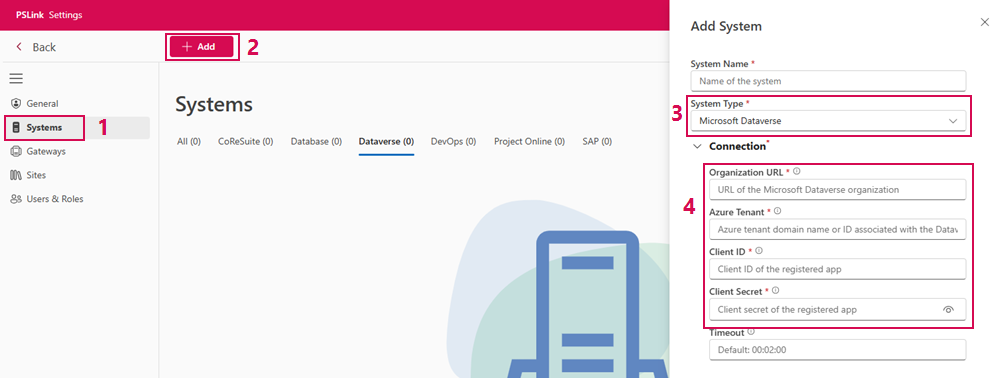
➢Navigate to Settings and Systems in TPG PSLink. (1)
➢Click +Add to create a new system. (2)
➢Select the Microsoft Dataverse type. (3)
➢Enter the connection information: Organization URL, Azure Tenant ID, Client ID and Client Secret. (4)
➢Click Add to save the system and register the connection.
Check Sites
Make sure, that the PSLink site you are operating on is the same as used within the MS Project Desktop Integration Add-In.
Check System Link
Ensure that you create a system link in your site that references the previously created system for Microsoft Dataverse access:
➢Navigate to System Links on your site.
➢Click +Add.
➢Enter an alias (name) for the system link.
➢Select the Dataverse system you configured earlier.
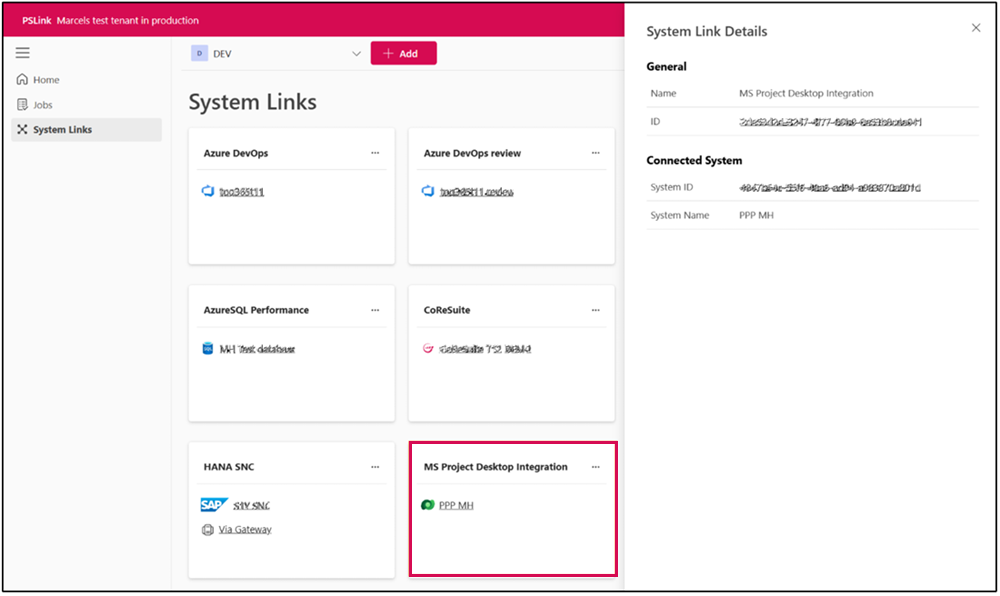
➢If possible, use the name MS Project Desktop Integration for the system link.
▶ We recommend creating the system link with the following name: MS Project Desktop Integration
The provided templates and preconfigured integration jobs are designed for this name and will only work without further adjustments if this name is used. If you need to use a different name, you must adjust the system link references in your job configuration in TPG PSLink accordingly